

How Do I Download Pictures From My Canon Camera To My Mac?
Getting Started
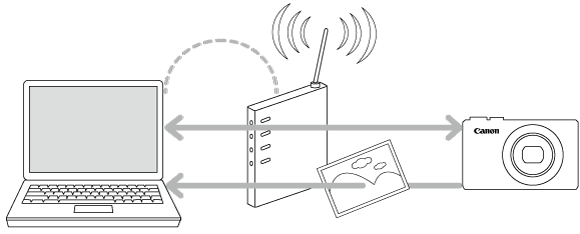
How to send images from the camera to a computer using Paradigm Transfer Utility ii.
IMPORTANT
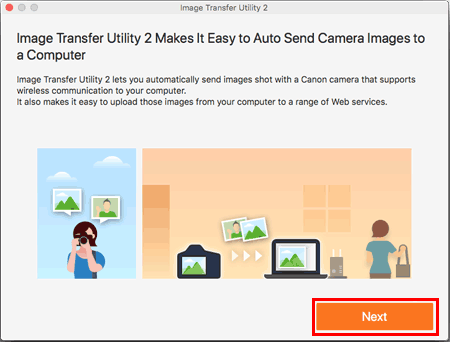
Pace i : Intalling Image Transfer Utility 2
 1. Download the software [ Epitome Transfer Utility 2 ] from the Canon homepage on to your computer, and proceed to installation.
2. In one case the installation is complete, the settings window for [ Epitome Transfer Utility 2 ] will be displayed, click [ Next ] .
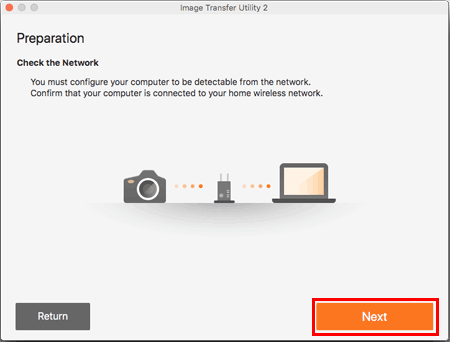
3. [ Preparation ] will be displayed, read the details carefully and click [ Next ] .
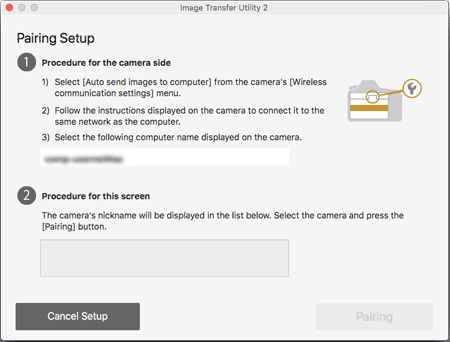
4. [ Pairing Setup ] will be displayed. Continue the screen every bit it is displayed, and motion on to the side by side step.
Footstep 2 : Connecting the Camera to the Computer
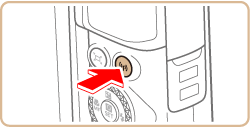
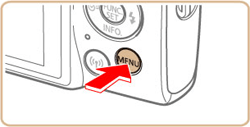
 1. Press the
  push button.
2. When the [ Nickname ] screen appears, press the  push.
push.
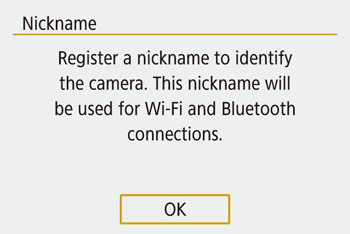

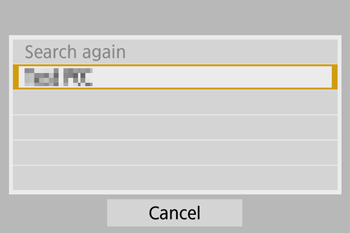
three. Ostend the Nickname (Proper name of the camera). After confirmation, press the  button.
REFERENCE
- Nicknames are 1 - eight characters and can be changed afterward.
4. Press the  /
/  buttons to cull [ OK ] , press the push.

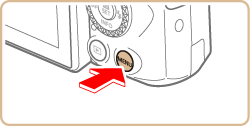
5. Press the button.
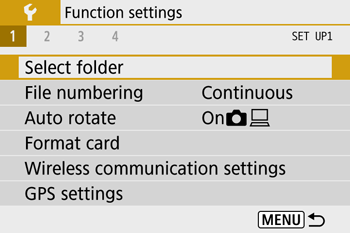
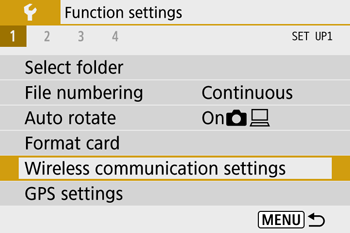
Return to the role settings menu.
6. Printing the / buttons to choose [  ] , printing the
  button.
seven. Press the / buttons to choose [ one ] .
8. Press the  /
/  buttons to choose [ Wireless advice settings ] , press the button.

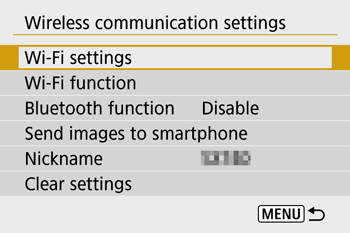
9. Printing the / buttons to choose [ Wi-Fi settings ] , press the button.
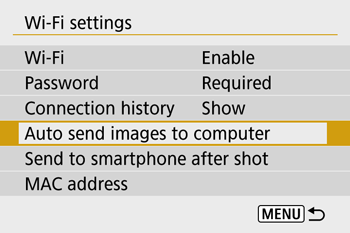
10. Press the / buttons to choose [ Motorcar send images to estimator ] , press the button.
Notation
If [ Wi-Fi ] settings has [ Disable ] selected, modify settings to [ Enable ] .
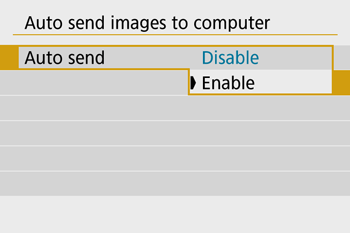
11. Press the / buttons to cull [ Motorcar send ] , press the button.
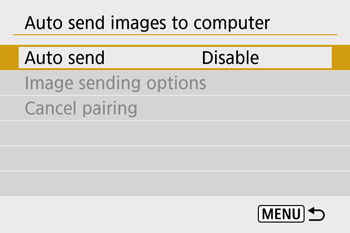
12. Press the / buttons to choose [ Enable ] , press the push button.
xiii. Printing the / buttons to cull [ OK ] , press the button.
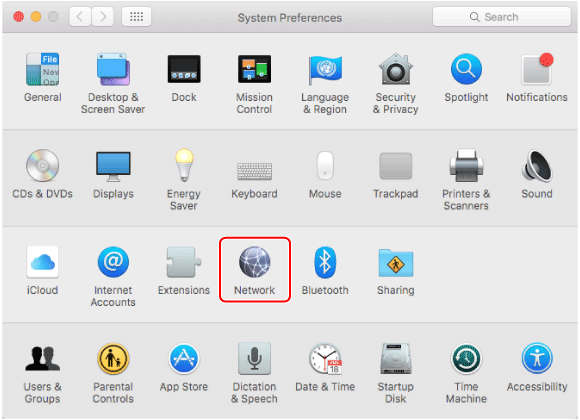
14. Click the [System Preferences] icon in the dock.

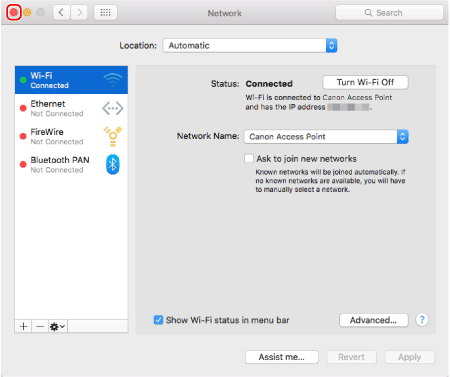
xv. Click the [Network] icon.
sixteen. Click [Wi-Fi].
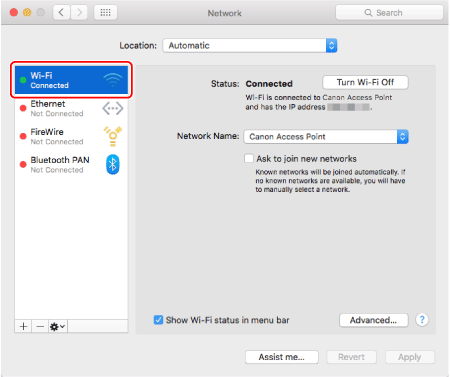
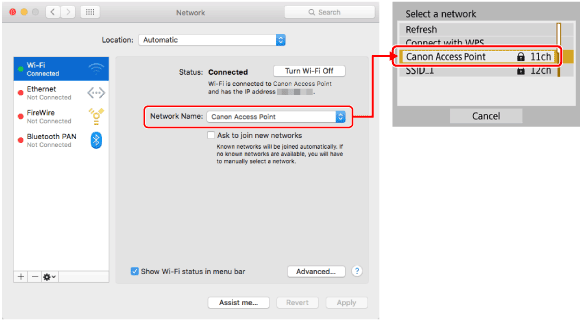
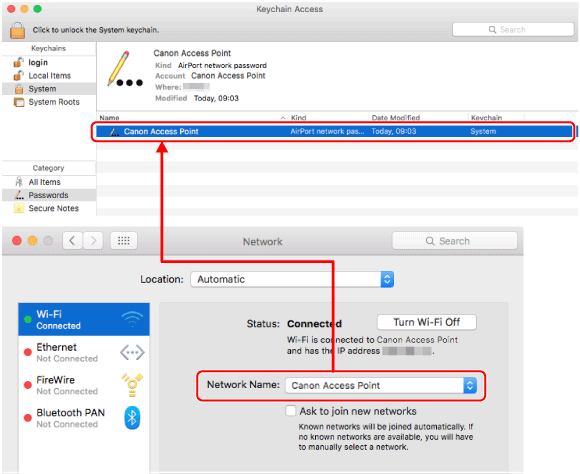
17. Select the network that matches with the i displayed in the [Network Proper name] field, and so printing the button. (Meet the network instance below).
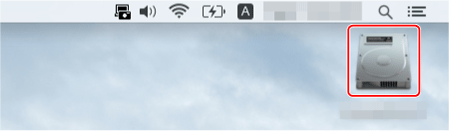
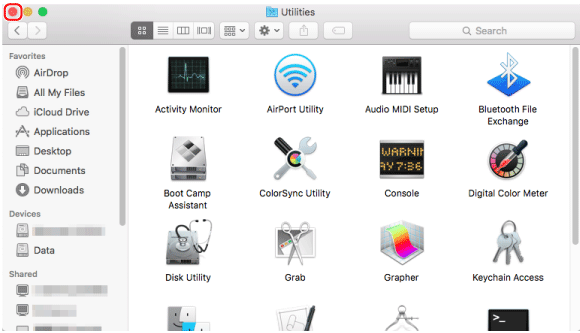
18. Double-click the difficult disk icon.
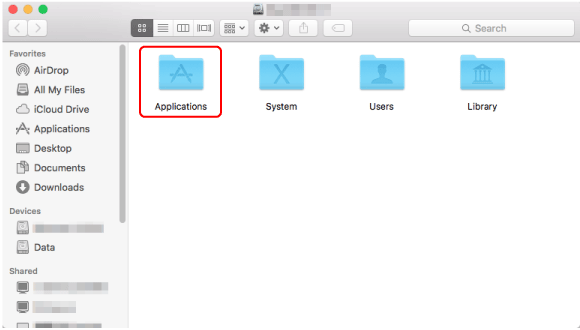
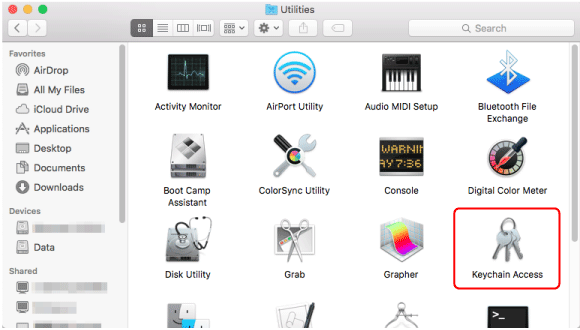
19. Double-click [Applications].
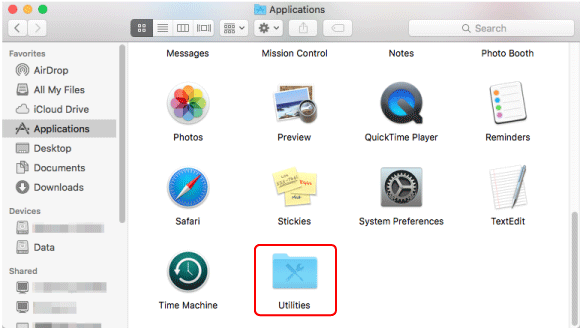
20. Double-click [Utilities].
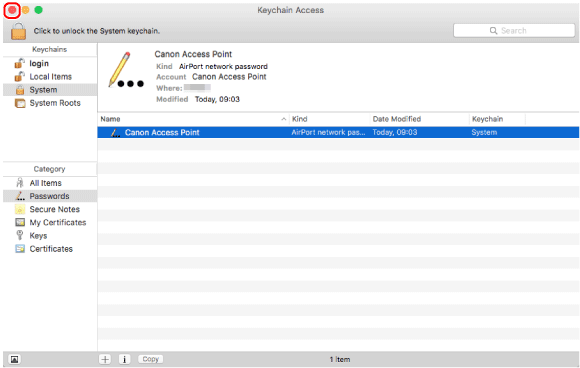
21. Double-click [Keychain Access].
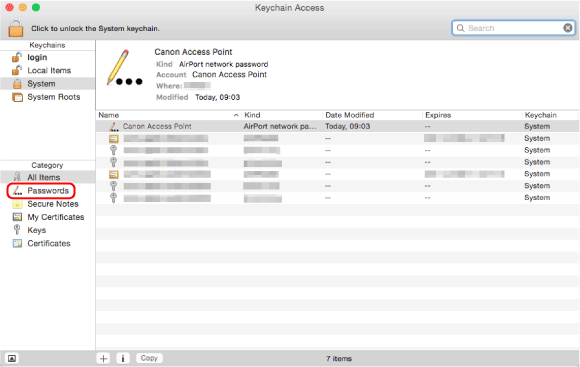
22. Select [Organisation] from the [Keychains] list.

23. Select [Passwords] from the [Category] list.
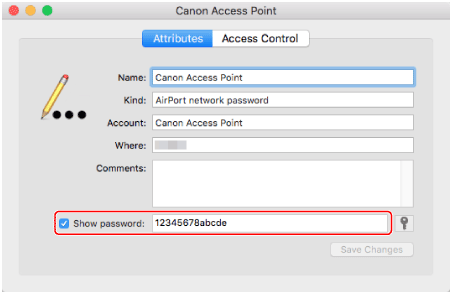
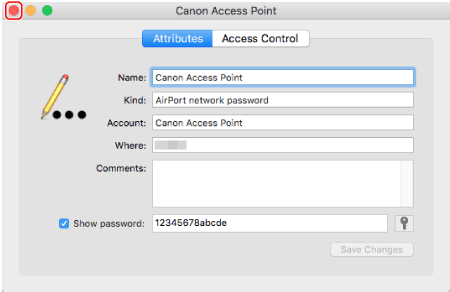
24. Double-click on the network that matches with [Network Name] on the [Network] screen.
25. Check the [Testify password] box.
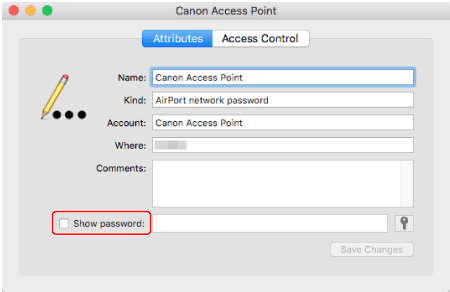
26. Enter the password that you use to log in to your Macintosh.
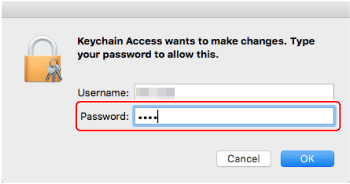
27. When the screen below appears, enter the username and password used to log in to Macintosh.

28. The access signal password is displayed. (See the password case below).
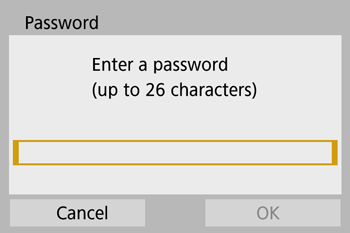
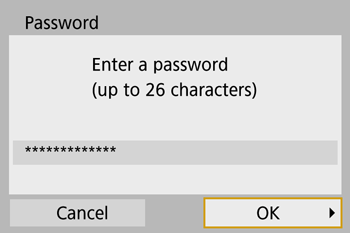
29. On the [ Password ] screen, press the button.
30. Enter the password displayed in the [Show password] field.
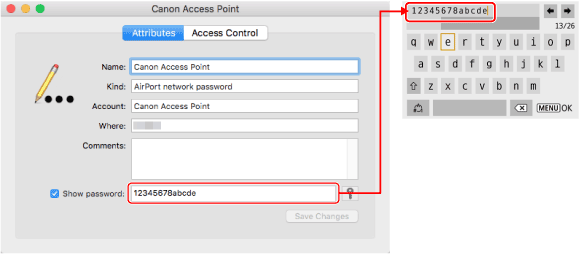
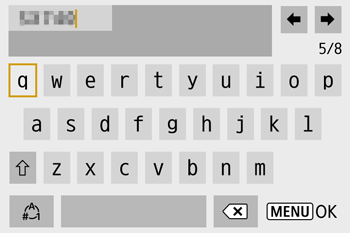
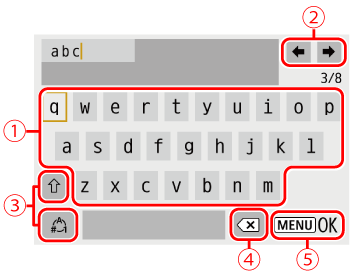
- For information on how to employ the on-screen keyboard, see [Using the On-Screen Keyboard].
- Press the button later the letters have been confirmed, before returning to the previous screen.
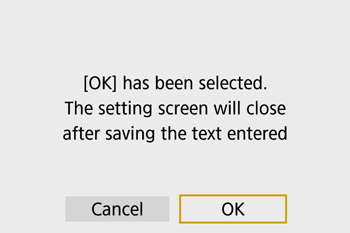
31. Afterwards the password has been entered, press the / buttons to choose [ OK ] , press the button.
32. Click [  ] to close the window.
33. Click [ ] to close [Keychain Access].
34. Click [ ] to close [Utilities].
35. Click [ ] to close [Network].
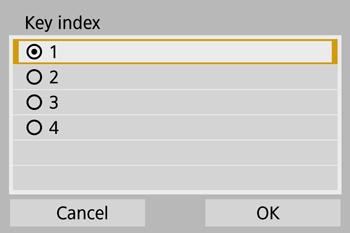
36. Printing the / buttons to choose Key alphabetize, printing the button. (This screen may or may non be displayed)
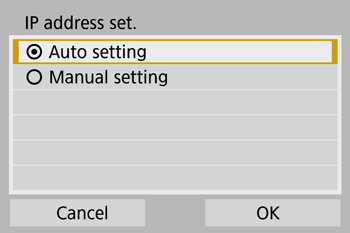
37. Press the / buttons to choose [ Motorcar setting ] , printing the push.
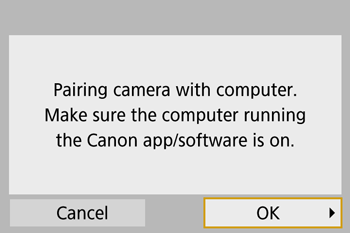
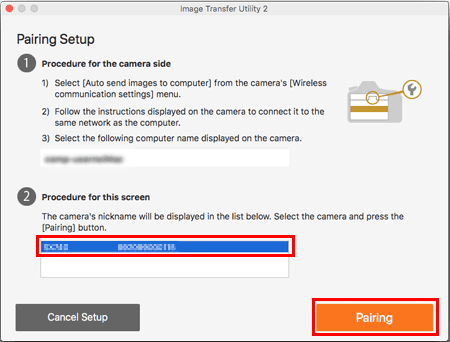
38. The computer proper noun volition appear. Confirm that the name displayed on the [ Pairing Setup ] screen is the same, printing the button.
39. If the camera Nickname is displayed under [ Process for this screen ] , select camera and click on [ Pairing ].
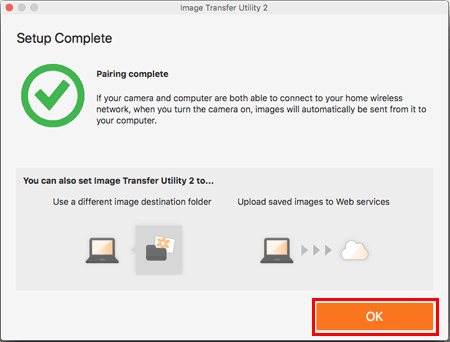
40. In one case pairing is consummate, the [ Setup Complete ] window will appear, click [ OK ] .
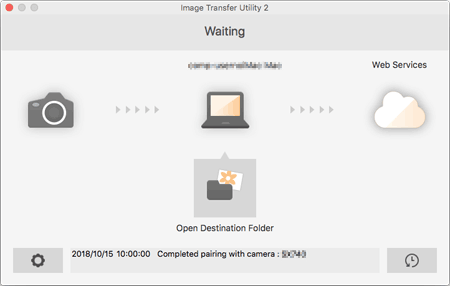
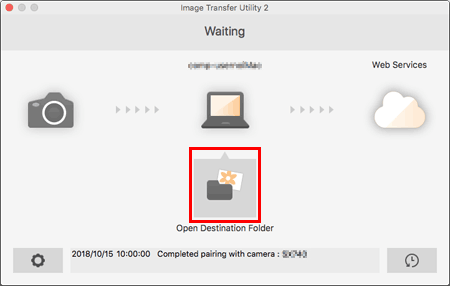
41. The [ Waiting ] window will announced for Prototype Transfer Utility ii. To go on transfering images from the photographic camera, stay on this screen and await.
Annotation
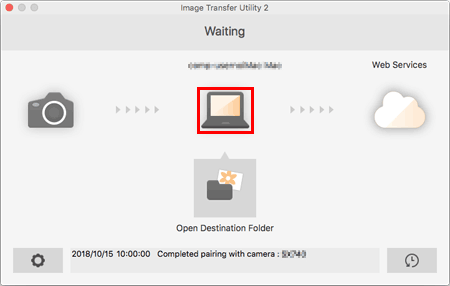
To save images in a different folder, click on the computer icon to open [ Prepare Destination Folder ] window.
Step 3 : Setting Up Auto Epitome Transfer
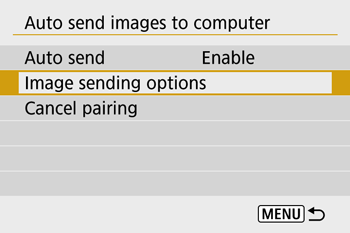
1. Choose [  ] card > [Wireless communication settings] > [Wi-Fi settings] > [Motorcar send images to computer].

2. Cull [ Image sending options ] .
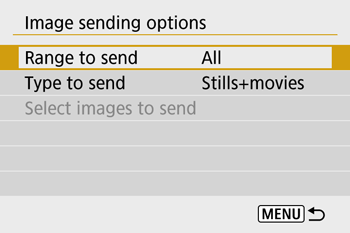
3. In [Prototype sending options], specify the transfer weather.
4. Make sure the camera is off.
Step four : Sending Images to the Calculator
1. Confirm that the Prototype Transfer Utility 2 window shows [ Waiting ] .
2. The images will automatically transfer to the computer once the camera has been turned on within range of the access point.
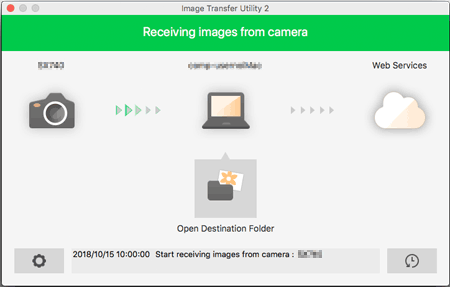
three. To confirm the transferred images, click [ Open Destination Folder ] .
- The images will at present exist automatically transferred to the reckoner everytime, one time the camera is turned on within range of the admission signal. If motorcar-transfer does not start, restart the camera.
Important
- When using automobile paradigm transfer, ensure that the battery pack has sufficient charge. Power saving on the photographic camera is deactivated.
- Whatsoever images captured after auto image transfer are non sent to the reckoner then. They are sent automatically when the camera is restarted.
NOTE
- Automobile prototype transfer to a reckoner is triggered by camera startup inside range of the access indicate. If auto paradigm transfer does not begin automatically, try restarting the photographic camera.
- To stop sending images automatically, choose [Car send images to reckoner] > [Auto send] > [Disable].
- Once Image Transfer Utility two is installed, information technology will continue to work unless the software has been closed.
- Click on
of the Prototype Transfer Utility 2 screen, cull [ Quit ] , this will disable motorcar-transfer even when the camera is turned on. To Enable wireless transfer again, turn on Prototype Transfer Utility 2.
Using the On-Screen Keyboard
Use the on-screen keyboard to enter information. Notation that the length and type of data y'all can enter varies depending on the function you
are using.
Annotation
- To render to the previous screen, printing the
button.

Source: https://support.usa.canon.com/kb/index?page=content&id=ART171790
Posted by: brownexter1951.blogspot.com
0 Response to "How Do I Download Pictures From My Canon Camera To My Mac?"
Post a Comment